At Consumer Auto, we pride ourselves on providing the most comprehensive guide to DIY auto repair and maintenance. Our guide is meticulously crafted to equip beginners with the knowledge and skills needed to confidently tackle basic auto repair tasks while understanding their vehicle better. Let’s delve into the details of each chapter to empower you on your journey to becoming a proficient DIY mechanic.
Why DIY Auto Repair and Maintenance Can Save You Money and Time
In today’s economic climate, saving money is paramount, and DIY auto repair offers a practical solution. By learning basic maintenance tasks and troubleshooting techniques, you can avoid costly trips to the mechanic and ensure your vehicle runs smoothly for years to come.
Chapter 1: Getting Started with DIY Auto Repair
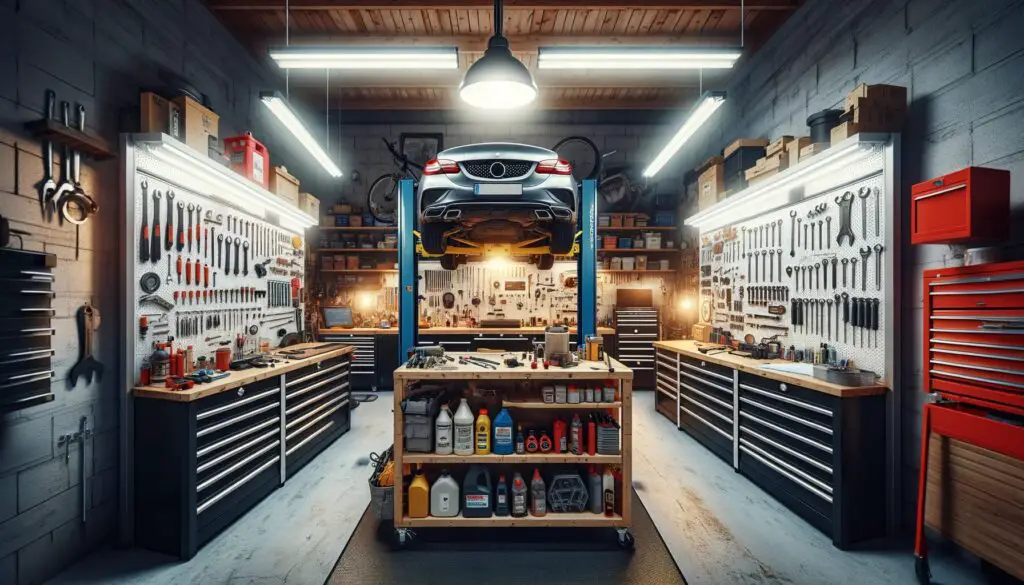
1.1 Essential Tools and Equipment Every DIY Mechanic Needs
To embark on your DIY auto repair journey, it’s crucial to have the right tools at your disposal. Here are some essential tools and equipment every DIY mechanic should have in their toolbox:
- Socket Wrench Set: A versatile tool for loosening and tightening bolts and nuts of various sizes.
- Screwdrivers: Both flathead and Phillips-head screwdrivers are essential for removing screws and fasteners.
- Pliers: Useful for gripping, bending, and cutting wires and hoses.
- Jack Stands: Provide sturdy support for safely raising and securing your vehicle during repairs.
- Torque Wrench: Ensures proper tightening of bolts to manufacturer specifications, preventing over-tightening or under-tightening.
1.2 Setting Up Your Workspace for Auto Repair Projects
Creating a dedicated workspace for auto repair is essential for safety, organization, and efficiency. Consider the following factors when setting up your workspace:
- Location: Choose a well-ventilated area with adequate lighting, preferably a garage or a designated corner of your driveway.
- Organization: Keep your tools and equipment neatly organized and easily accessible to streamline repair projects and minimize time wasted searching for tools.
- Safety Precautions: Install fire extinguishers, first aid kits, and emergency exits in your workspace. Ensure proper ventilation to minimize exposure to harmful fumes.
1.3 Safety First: Understanding the Risks and How to Mitigate Them
Working on vehicles exposes you to various risks, from sharp tools to hazardous chemicals. Prioritize safety by following these guidelines:
- Protective Gear: Wear appropriate protective gear, including safety goggles, gloves, and steel-toed boots, to protect against injuries.
- Proper Technique: Follow manufacturer guidelines and proper procedures when working on your vehicle to minimize the risk of accidents.
- Education: Familiarize yourself with common hazards and safety protocols before starting any repair or maintenance task.
By investing in the right tools, setting up a safe and organized workspace, and prioritizing safety, you can embark on your DIY auto repair journey with confidence and peace of mind. Stay tuned for more in-depth chapters covering essential maintenance tasks and expert tips.
Chapter 2: Basic Maintenance Tips for Every Car Owner
Maintaining your vehicle is key to its longevity and performance. In this chapter, we’ll cover essential maintenance tasks that every car owner should know.
2.1 How to Change Your Oil and Oil Filter
Regular oil changes are the cornerstone of engine maintenance. Here’s a step-by-step guide to performing this crucial task:
- Gather Materials: You’ll need new oil, a new oil filter, a wrench, a drain pan, and gloves.
- Preparation: Park your car on a level surface and let the engine cool down.
- Drain Old Oil: Locate the oil drain plug under your car, place the drain pan beneath it, and unscrew the plug to drain the old oil.
- Replace Oil Filter: Remove the old oil filter using a wrench, apply a thin layer of oil to the new filter’s gasket, and install the new filter.
- Add New Oil: Use a funnel to pour the recommended amount of new oil into the engine.
- Check Oil Level: Start the engine and let it run for a few minutes, then turn it off and check the oil level using the dipstick. Add more oil if necessary.
2.2 Replacing Air Filters to Keep Your Engine Running Smoothly
Clean air filters are essential for optimal engine performance. Follow these steps to inspect and replace your air filter:
- Locate Air Filter Housing: Open your car’s hood and locate the air filter housing, usually a rectangular box near the engine.
- Remove Old Filter: Open the housing and remove the old air filter, taking note of its orientation.
- Inspect and Clean: Inspect the old filter for dirt and debris. If dirty, gently tap it on a hard surface to remove loose particles.
- Install New Filter: Insert the new air filter into the housing, ensuring it’s properly seated and oriented as per manufacturer instructions.
- Close Housing: Close the housing securely to prevent air leaks.
2.3 The Importance of Regular Fluid Checks and Changes
Regular fluid checks are vital for maintaining various systems in your vehicle. Here’s how to check and replenish essential fluids:
- Coolant: Check the coolant level in the overflow reservoir when the engine is cool. Add coolant if the level is low, using a mix of coolant and distilled water as recommended.
- Transmission Fluid: Consult your vehicle’s owner’s manual for instructions on checking transmission fluid levels. Add fluid if necessary, using the type recommended by the manufacturer.
- Brake Fluid: Locate the brake fluid reservoir under the hood and check the fluid level. Add brake fluid if needed, using the type specified by your vehicle’s manufacturer.
- Power Steering Fluid: Similar to brake fluid, locate the power steering fluid reservoir and check the fluid level. Top up as necessary with the recommended fluid.
2.4 How to Maintain Your Car’s Battery Health
A well-maintained battery is essential for reliable vehicle operation. Follow these steps to inspect and maintain your car battery:
- Visual Inspection: Check the battery terminals for corrosion and clean them with a mixture of baking soda and water if necessary.
- Test Battery Voltage: Use a multimeter to test the battery voltage. A healthy battery should read around 12.6 volts.
- Check Fluid Level (if applicable): If you have a non-sealed battery, check the fluid level and top up with distilled water if necessary.
- Charge if Needed: If the battery voltage is low, use a battery charger to recharge it slowly and safely.
By following these basic maintenance tips, you can ensure that your vehicle stays in top condition and avoid costly repairs down the road. Stay tuned for more chapters covering additional maintenance tasks and expert tips.
Chapter 3: Tire Maintenance and Replacement
Tires play a crucial role in your vehicle’s performance and safety. In this chapter, we’ll cover essential tire maintenance tasks and how to safely replace a tire when needed.
3.1 How to Check Tire Pressure and Why It’s Important
Proper tire pressure is vital for several reasons, including optimal fuel efficiency, even tire wear, and vehicle safety. Here’s how to check and adjust tire pressure:
- Gather Materials: You’ll need a tire pressure gauge and access to an air compressor.
- Locate Recommended Pressure: Check your vehicle’s owner’s manual or the placard located inside the driver’s side door jamb for the recommended tire pressure.
- Check Tire Pressure: Remove the valve cap from the tire, firmly press the tire pressure gauge onto the valve stem, and read the pressure on the gauge. Compare it to the recommended pressure.
- Adjust Pressure: If the pressure is too low, use an air compressor to add air until it reaches the recommended pressure. If it’s too high, release air using the valve stem.
- Repeat for All Tires: Check and adjust the pressure in all four tires, including the spare if applicable.
3.2 Rotating Your Tires: A Step-by-Step Guide
Regular tire rotation helps ensure even tire wear and prolongs the lifespan of your tires. Follow these steps to rotate your tires at home:
- Identify Tire Rotation Pattern: Consult your vehicle’s owner’s manual for the recommended tire rotation pattern, which varies depending on whether your vehicle is front-wheel drive, rear-wheel drive, or all-wheel drive.
- Jack Up Vehicle: Use a jack to lift one corner of the vehicle at a time, ensuring it’s securely supported by jack stands.
- Remove and Reinstall Tires: Remove each tire and reinstall it in the designated position according to the rotation pattern.
- Lower Vehicle and Torque Lug Nuts: Lower the vehicle to the ground and tighten the lug nuts to the manufacturer’s specifications using a torque wrench.
- Repeat for Each Corner: Repeat the process for each corner of the vehicle, ensuring all tires are rotated according to the recommended pattern.
3.3 When and How to Change a Tire Safely
Flat tires can happen unexpectedly, so knowing how to change a tire is essential for every driver. Follow these steps to safely replace a flat tire:
- Find Safe Location: Pull over to a safe location away from traffic and on level ground.
- Gather Materials: You’ll need a jack, lug wrench, spare tire, and wheel chocks.
- Loosen Lug Nuts: Use the lug wrench to loosen the lug nuts on the flat tire, but don’t remove them completely.
- Jack Up Vehicle: Place the jack under the vehicle’s frame near the flat tire and raise the vehicle until the flat tire is off the ground.
- Remove Flat Tire: Finish removing the lug nuts and carefully remove the flat tire.
- Install Spare Tire: Place the spare tire onto the wheel studs and hand-tighten the lug nuts.
- Lower Vehicle and Tighten Lug Nuts: Lower the vehicle to the ground and tighten the lug nuts in a star pattern using the lug wrench.
- Check Tire Pressure: Use a tire pressure gauge to check the pressure in the spare tire and adjust if necessary.
- Stow Equipment and Drive Cautiously: Stow the jack, lug wrench, and flat tire in your vehicle and drive cautiously to the nearest service center to have the flat tire repaired or replaced.
By following these tire maintenance and replacement guidelines, you can ensure your vehicle’s tires are in optimal condition for safe and efficient driving. Stay tuned for more chapters covering additional maintenance tasks and expert tips.
Chapter 4: Brakes Maintenance
Maintaining your vehicle’s brakes is essential for your safety on the road. In this chapter, we’ll cover how to identify signs of brake wear and tear, as well as how to replace brake pads and rotors.
4.1 Identifying Signs of Brake Wear and Tear
Regular brake maintenance is crucial for ensuring your safety while driving. Here are some common signs of brake wear and tear to watch out for:
- Squealing or Grinding Noise: If you hear a high-pitched squealing or grinding noise when applying the brakes, it’s a sign that the brake pads are worn down and need replacement.
- Vibrations or Pulsations: Vibrations or pulsations felt through the brake pedal or steering wheel when braking could indicate warped brake rotors.
- Soft or Spongy Brake Pedal: A soft or spongy brake pedal that goes all the way to the floor when pressed could indicate air in the brake lines or worn brake pads.
- Uneven Brake Pad Wear: Check the brake pads for uneven wear patterns, which could indicate issues with the brake calipers or brake system alignment.
If you notice any of these signs, it’s essential to inspect your vehicle’s brakes promptly and address any issues to ensure your safety on the road.
4.2 How to Replace Brake Pads and Rotors
Replacing brake pads and rotors is a straightforward task that can save you money on labor costs. Follow these steps to replace your brake pads and rotors at home:
- Gather Materials: You’ll need a jack, jack stands, lug wrench, C-clamp, brake cleaner, and new brake pads and rotors.
- Prepare Vehicle: Park your car on a level surface, engage the parking brake, and chock the wheels to prevent rolling.
- Remove Wheel: Loosen the lug nuts on the wheel you’ll be working on, lift the car with the jack, and secure it with jack stands. Remove the lug nuts and take off the wheel.
- Remove Caliper: Use a wrench to remove the caliper bolts and lift the caliper off the rotor. Hang the caliper from the suspension using a wire hanger or bungee cord to prevent damage to the brake hose.
- Replace Brake Pads: Remove the old brake pads from the caliper bracket and install the new brake pads. Use a C-clamp to compress the caliper piston if necessary.
- Replace Rotors (if needed): If replacing the rotors, remove the caliper bracket bolts and take off the bracket. Remove the old rotor and install the new one.
- Reassemble and Test: Reinstall the caliper bracket and caliper, tighten the bolts to the manufacturer’s specifications, and remount the wheel. Lower the car, tighten the lug nuts, and test the brakes before driving.
By following these steps, you can replace your brake pads and rotors at home and restore optimal braking performance to your vehicle. Stay tuned for more chapters covering additional maintenance tasks and expert tips.
Chapter 5: Engine and Transmission Basics
Understanding the fundamentals of your car’s engine and transmission is key to maintaining optimal performance and longevity. In this chapter, we’ll cover essential topics such as the cooling system, basic engine maintenance, and transmission care.
5.1 Understanding Your Car’s Cooling System
A properly functioning cooling system is vital for preventing engine overheating and costly repairs. Here’s how to inspect, flush, and refill your car’s cooling system:
- Inspect Cooling System Components: Check the radiator, hoses, and coolant reservoir for signs of leaks, cracks, or damage.
- Flush the Cooling System: Follow manufacturer recommendations for flushing the cooling system to remove old coolant and debris. Use a flushing agent and water to clean the system thoroughly.
- Refill with Coolant: After flushing, refill the cooling system with the recommended coolant type and mix ratio. Bleed air from the system to ensure proper circulation.
- Check for Leaks: Run the engine and inspect for any signs of coolant leaks. Repair any leaks promptly to prevent overheating.
5.2 Basic Engine Checks and Maintenance
Regular engine maintenance is essential for preserving performance and reliability. Here are some basic engine checks and maintenance tasks you can perform:
- Check Oil Level: Regularly check the engine oil level using the dipstick and top up as needed with the recommended oil type.
- Inspect Belts and Hoses: Check for signs of wear or damage on engine belts and hoses, such as cracks, fraying, or leaks. Replace as necessary.
- Monitor Engine Performance: Pay attention to any changes in engine performance, such as rough idling, stalling, or reduced power. Address issues promptly to prevent further damage.
- Address Oil Leaks: If you notice oil leaks under the engine, inspect and replace gaskets or seals to prevent oil loss and potential engine damage.
- Replace Air Filter: Regularly replace the engine air filter to ensure optimal airflow and fuel efficiency.
5.3 Tips for Maintaining Your Transmission
The transmission plays a crucial role in your vehicle’s drivetrain, so it’s essential to keep it well-maintained. Here are some tips for maintaining your transmission:
- Check Transmission Fluid Levels: Regularly check the transmission fluid level using the dipstick and top up as needed with the recommended fluid type.
- Perform Regular Fluid Changes: Follow manufacturer recommendations for transmission fluid changes to prevent buildup of debris and contaminants.
- Inspect for Leaks: Check for any signs of transmission fluid leaks under the vehicle and repair leaks promptly to prevent damage to the transmission.
- Avoid Overheating: Avoid towing heavy loads or driving in extreme conditions that can cause the transmission to overheat, leading to premature wear and damage.
By understanding and performing these basic engine and transmission maintenance tasks, you can ensure that your vehicle operates smoothly and reliably for years to come. Stay tuned for more chapters covering additional maintenance topics and expert tips.
Chapter 6: Electrical Systems and Troubleshooting
Understanding the electrical systems in your vehicle is essential for maintaining functionality and diagnosing common issues. In this chapter, we’ll cover how to troubleshoot common electrical problems and replace fuses and bulbs.
6.1 Diagnosing Common Electrical Issues in Cars
Electrical problems in cars can be frustrating, but with the right knowledge, you can diagnose and resolve them effectively. Here’s how to troubleshoot common electrical issues:
- Check Battery Health: Start by checking the battery voltage using a multimeter. A healthy battery should read around 12.6 volts. If the voltage is low, recharge or replace the battery.
- Inspect Wiring: Visually inspect the wiring harnesses and connectors for signs of damage or corrosion. Repair or replace any damaged wires or connectors.
- Test Fuses: Use a test light or multimeter to check the continuity of fuses. Replace any blown fuses with ones of the same amperage rating.
- Check Grounds: Ensure that all ground connections are clean and tight. Poor ground connections can cause electrical issues.
- Scan for Fault Codes: Use an OBD-II scanner to retrieve any stored fault codes from the vehicle’s computer. Address any codes related to electrical components.
- Test Components: Test individual electrical components, such as relays and switches, to identify faulty parts. Replace any components that are not functioning properly.
By following these steps, you can effectively diagnose and resolve common electrical issues in your car, keeping it running smoothly on the road.
6.2 Replacing Fuses and Bulbs: A How-To Guide
Faulty fuses and bulbs can cause various electrical problems in your vehicle. Here’s how to locate and replace these components:
- Locate Fuse Box: Refer to your vehicle’s owner’s manual to find the location of the fuse box. It’s typically located under the dashboard or in the engine compartment.
- Identify Blown Fuse: Use a fuse tester or visually inspect the fuses to identify any blown fuses. Blown fuses will have a broken wire inside.
- Replace Fuse: Use a fuse puller or needle-nose pliers to remove the blown fuse and replace it with a new one of the same amperage rating.
- Locate Bulb Housing: To replace bulbs, locate the housing for the specific bulb that needs replacing. This may require accessing the headlight or taillight assembly.
- Remove Old Bulb: Twist or unclip the bulb socket to remove the old bulb from the housing.
- Install New Bulb: Insert the new bulb into the socket, ensuring it is securely seated.
- Test Functionality: Turn on the headlights or activate the turn signal to test the functionality of the new bulb.
By following these steps, you can easily replace fuses and bulbs in your vehicle, restoring proper functionality to the electrical system.
Chapter 7: Interior and Exterior Maintenance
Maintaining both the interior and exterior of your car is crucial for its appearance, comfort, and longevity. In this chapter, we’ll cover tips for keeping your car’s interior clean and fresh, as well as simple techniques for maintaining its exterior.
7.1 Keeping Your Car’s Interior Clean and Fresh
A clean and well-maintained interior not only enhances comfort but also preserves the value of your vehicle. Here are some top tips for cleaning and preserving your car’s interior surfaces:
- Vacuum Regularly: Use a vacuum cleaner with a brush attachment to remove dust, dirt, and debris from carpets, upholstery, and floor mats.
- Use Interior Cleaner: Choose a mild interior cleaner appropriate for the material of your seats, dashboard, and other surfaces. Spray the cleaner onto a microfiber cloth and wipe surfaces clean.
- Condition Leather Upholstery: Apply a leather conditioner to leather seats and trim to keep them soft, supple, and crack-free.
- Protect Dashboard and Trim: Use a UV protectant spray to shield dashboard and trim surfaces from sun damage and fading.
- Clean Windows and Mirrors: Use a glass cleaner and microfiber cloth to clean windows and mirrors, leaving them streak-free and clear for optimal visibility.
- Freshen Air: Use an air freshener or odor eliminator to keep the interior smelling clean and fresh. Consider using odor-absorbing products such as charcoal bags to neutralize odors.
- Remove Stains Promptly: Treat spills and stains on upholstery and carpets promptly to prevent them from setting and becoming more difficult to remove.
By following these tips, you can maintain a clean and fresh interior environment in your car, enhancing comfort and preserving its value over time.
7.2 Simple Tips for Maintaining the Exterior of Your Car
Regular washing, waxing, and detailing are essential for protecting your car’s exterior and keeping it looking its best. Here’s how to properly maintain the exterior of your vehicle:
- Wash Regularly: Wash your car regularly with a mild automotive shampoo and a soft sponge or microfiber wash mitt to remove dirt, grime, and contaminants.
- Use Two-Bucket Method: Fill one bucket with soapy water and another with clean water for rinsing. Dip the wash mitt into the soapy water, wash a section of the car, then rinse the mitt in the clean water before dipping it back into the soap.
- Dry Thoroughly: Use a clean, soft microfiber towel to dry the car thoroughly after washing to prevent water spots and streaks.
- Apply Wax: Apply a coat of wax to protect the paint and enhance shine. Use a high-quality carnauba wax or synthetic sealant, and follow the manufacturer’s instructions for application.
- Polish as Needed: Use a polishing compound to remove minor scratches and swirl marks from the paint surface, restoring a smooth and glossy finish.
- Protect Trim and Rubber: Apply a trim protectant to exterior trim and rubber seals to prevent fading, drying out, and cracking.
- Check for Damage: Regularly inspect the exterior of your car for signs of damage, such as scratches, dents, or paint chips. Address any issues promptly to prevent rust and corrosion.
By following these simple tips, you can maintain the exterior of your car, protect its paint, and ensure it looks its best year-round.
Chapter 8: Seasonal Car Maintenance
Preparing Your Car for Winter
Winter weather can be harsh on your vehicle, so it’s essential to take proactive measures to protect it. Our guide will help you winterize your car with tips on checking antifreeze levels, installing snow tires, and more.
Getting Your Car Ready for Summer
Summer heat can take a toll on your vehicle’s performance and comfort. Learn how to prepare your car for summer driving with tips on checking coolant levels, inspecting air conditioning systems, and more.
Chapter 9: Troubleshooting Common Problems
What to Do When Your Car Won’t Start
A non-starting car can be frustrating, but our troubleshooting guide will help you identify and resolve common issues quickly. From dead batteries to faulty starters, we’ll walk you through the steps to get your car back on the road.
How to Diagnose and Fix Common Engine Problems
Strange noises or rough idling could indicate underlying engine issues. Our guide will help you diagnose common engine problems such as misfires, overheating, and oil leaks, so you can address them promptly and prevent further damage.
Solving Overheating Issues
Engine overheating can lead to costly repairs if left unchecked. Learn how to troubleshoot overheating issues and prevent damage to your engine with our comprehensive guide.
Chapter 10: Upgrading Your Car
Basic Upgrades to Improve Performance and Efficiency
Whether you’re looking to boost horsepower or enhance fuel efficiency, our guide offers practical tips for upgrading your vehicle’s performance. From aftermarket air intakes to performance exhaust systems, we’ll help you choose the right upgrades for your needs and budget.
DIY Aesthetic Modifications for Your Car
Personalizing your car’s appearance is a fun way to make it stand out on the road. Explore our DIY aesthetic modification ideas, from custom decals to interior LED lighting, and give your vehicle a unique look that reflects your style.
Frequently Asked Questions (FAQs)
Can I perform maintenance on a leased vehicle?
Yes, you can perform basic maintenance tasks on a leased vehicle, but be sure to check your lease agreement for any restrictions or requirements regarding maintenance and repairs.
How often should I perform maintenance on my car?
Regular maintenance intervals vary depending on factors such as mileage, driving conditions, and manufacturer recommendations. Refer to your vehicle’s owner’s manual for specific maintenance schedules tailored to your make and model.
What are the most common tools needed for DIY auto repair?
Some essential tools for DIY auto repair include socket wrench sets, screwdrivers, pliers, jack stands, and a torque wrench. Investing in quality tools will ensure smoother repair projects and better results.
How do I know if a problem is beyond my skills?
If you encounter a problem that exceeds your knowledge or skill level, don’t hesitate to seek professional assistance. Attempting complex repairs without proper expertise could worsen the issue and lead to costly repairs down the line.
Conclusion
In conclusion, mastering the art of DIY auto repair and maintenance is not only empowering but also practical in saving both time and money. By following our comprehensive guide and applying the tips and techniques outlined herein, you’ll gain the confidence and expertise needed to keep your vehicle running smoothly for years to come.
Additional Resources
Recommended Books and Websites for Further Learning
- “Auto Repair For Dummies” by Deanna Sclar
- “How Cars Work” by Tom Newton
- “YouTube Channels for DIY Auto Repair” – CarThrottle, ChrisFix, EricTheCarGuy
Local Workshops and Online Courses for DIY Auto Repair Enthusiasts
By leveraging these additional resources, you can further expand your knowledge and skills in DIY auto repair and maintenance. Happy wrenching!