Imagine cruising down the open road, feeling the wind in your hair, and the sweet sound of your favorite tunes filling your car. A high-quality car audio system can take your driving experience to new heights, turning ordinary journeys into thrilling adventures. If you’re considering upgrading your car’s audio system, you’re in the right place! In this step-by-step guide, our professional mechanic will show you how to install a car audio system that will make every drive a delight.
Headings:
- Getting Started: Essential Tools and Materials
- Choosing the Perfect Car Audio System
- Saying Goodbye to Your Old Audio System
- Wiring and Connecting Your New Audio System
- Mounting Your New Audio System
- Testing and Fine-Tuning for Exceptional Sound
- Troubleshooting Common Issues
Read More :
How To Apply for Free Cars for College Students
Welcome to our comprehensive step-by-step guide on how to install a car audio system, brought to you by Professional Mech
Section 1: Getting Started – Essential Tools and Materials
Before you begin, it’s essential to gather all the necessary tools and materials for a successful car audio installation. Our expert mechanic recommends having wire cutters, pliers, screwdrivers, a multimeter, and a drill, along with the correct gauge of wire, connectors, and fuses. With the right equipment by your side, you’ll be well on your way to an enjoyable and hassle-free installation process.
Section 2: Choosing the Perfect Car Audio System
Selecting the ideal car audio system can feel overwhelming, but it doesn’t have to be. Start by considering your car’s make and model, the sound quality you’re after, and any additional features you might want (such as Bluetooth, GPS, or touchscreen capabilities). Our mechanic advises researching various speaker, amplifier, and subwoofer options, and reading reviews to find a system that meets your requirements. Remember, investing in a high-quality system will not only deliver incredible sound but also provide lasting performance.
Section 3: Saying Goodbye to Your Old Audio System
Out with the old and in with the new! First, safely disconnect your car’s battery to avoid any electrical mishaps. Then, gently remove your old speakers, amplifier, and head unit from the vehicle. Our mechanic stresses the importance of handling old wiring with care and removing any related components that may hinder the installation process.
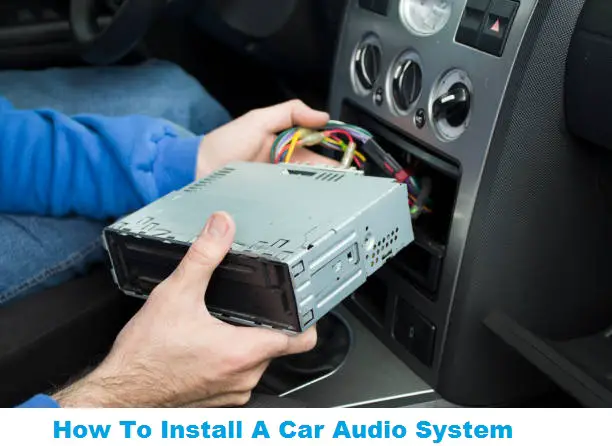
Section 4: Wiring and Connecting Your New Audio System
Properly wiring and connecting your new audio system is crucial to ensure excellent sound quality and performance. Our mechanic recommends connecting the head unit, amplifier, and speakers correctly, as well as running wiring through your vehicle in a neat and organized manner. Don’t forget to ground your audio system securely and use connectors to establish stable connections.
Section 5: Mounting Your New Audio System
With your new audio system wired and connected, it’s time to mount the components in your vehicle. Our mechanic suggests positioning the speakers, amplifier, and head unit in their appropriate locations, guaranteeing a secure and stable installation. Be mindful of wiring routes to minimize the risk of damage.
Section 6: Testing and Fine-Tuning for Exceptional Sound
Now comes the exciting part – testing and fine-tuning your new audio system! Our mechanic recommends adjusting the settings on the head unit and amplifier, setting the equalizer, and balancing the sound between speakers. With some patience and a discerning ear, you’ll soon have your new system sounding better than you ever imagined.
Section 7: Troubleshooting Common Issues
Even the most experienced mechanics can face challenges during an installation. Common issues include wiring problems, blown fuses, and distorted sound. Our mechanic emphasizes the importance of staying calm and using your troubleshooting skills to diagnose and resolve these issues, ensuring a successful installation.
Conclusion:
Upgrading your car’s audio system may seem daunting, but with the right tools, knowledge, and expert guidance from a professional mechanic.
Some FAQ’s
- Is it necessary to upgrade my car’s audio system?
It depends on your personal preferences and the quality of your current system. If you’re looking for a better sound quality and additional features, upgrading your car’s audio system can enhance your driving experience.
- Can I install a car audio system myself?
Yes, with the right tools and knowledge, you can install a car audio system yourself. However, if you’re not confident in your abilities, it’s best to consult with a professional mechanic.
- How much does it cost to upgrade a car’s audio system?
The cost of upgrading a car’s audio system varies depending on the quality of the components and the complexity of the installation. On average, you can expect to spend between $300 to $2,000.
- What are the essential components of a car audio system?
The essential components of a car audio system include a head unit, speakers, amplifier, and subwoofer. Additional features such as GPS, Bluetooth, and touchscreen capabilities are optional.
- Can upgrading my car’s audio system affect my car’s battery life?
Yes, upgrading your car’s audio system can affect your car’s battery life if the system requires more power than your current battery can handle. It’s essential to consider your car’s electrical system and battery capacity when selecting a new audio system.
Read More :